1. 설정
그래이들
implementation 'org.springframework.boot:spring-boot-starter-cache'config 설정
@Configuration
@EnableCaching
public class CacheConfig {
}
2. 사용
캐시 할 내용에 @Cacheable
캐시 삭제시 @CacheEvict
캐시 업데이트 시 @Cacheput
import org.springframework.cache.Cache;
import org.springframework.cache.CacheManager;
import org.springframework.cache.annotation.CacheEvict;
import org.springframework.cache.annotation.Cacheable;
import org.springframework.stereotype.Service;

import java.util.Collection;
import java.util.Random;
import java.util.concurrent.ConcurrentHashMap;

@Service
public class CacheService {

    private final CacheManager cacheManager;

    public CacheService(CacheManager cacheManager) {
        this.cacheManager = cacheManager;
    }

    @Cacheable(value = "random", key = "#id")
    public String cacheRandom( String id) {
        Random random = new Random();
        return id + "_" + random.nextInt(100);
    }

    @CacheEvict(value = "random", key = "#id")
    public void cacheRandomEvict(String id) {

    }

    public void cacheAll() {
        Collection<String> cacheNames = cacheManager.getCacheNames();
        for (String cacheName : cacheNames) {
            System.out.println("cacheName = " + cacheName);
        }
        Cache random = cacheManager.getCache("random");
        System.out.println("random = " + random);

        for (String cacheName : cacheNames) {
            Cache cache = cacheManager.getCache(cacheName);

            if (cache != null) {
                ConcurrentHashMap nativeCache = (ConcurrentHashMap) cache.getNativeCache();
                System.out.println("nativeCache = " + nativeCache);
                System.out.println("nativeCache type = " + nativeCache.getClass().getName() );
                ConcurrentHashMap cacheMap = (ConcurrentHashMap) nativeCache;
                cacheMap.forEach((strKey, strValue)->{
                    System.out.println( strKey +" : "+ strValue );
                });
            }
        }

    }
}
CacheManger (구현체 ConcurrentMapCacheManager )를 통해서 캐시 이름 목록을 가져오고
다시 이름으로 Cache 를 가져오고
가져온 캐시를 ConcurrentHashMap으로 변환 후 순회한다.
'Java > 스프링부트' 카테고리의 다른 글
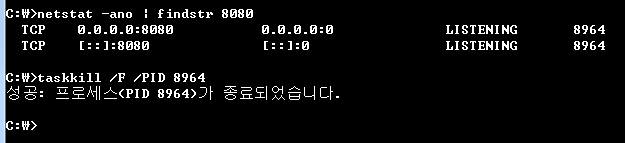
| (스프링 부트 + 톰캣) 프로세스 실행 중 셧다운 명령 시 톰캣 프로세스가 살아 있는 문제 (1) | 2023.12.19 |
|---|---|
| SpringBoot IntellJ thymeleaf 변경 시 바로 적용 - reload (0) | 2023.03.19 |
| Thymeleaf layout 사용시 전체 title 적용 규칙 (0) | 2022.11.09 |
| 스프링부트 로컬에서 여러개 띄울때 세션 끊어지는 것 방지 (0) | 2022.01.06 |
| Spring Boot 에서 Validation 사용자 정의 커스터마이징 하여 사용하기 (0) | 2021.09.10 |